What is RID and how to use it
RID is a Request ID or a unique request identifier. It’s a unique string that WP Cerber generates for every logged HTTP request and writes to the log along with other request details. The main reason for using RID is to look up a particular request in the log while performing maintenance tasks. This is especially useful when a request has been blocked by WP Cerber.
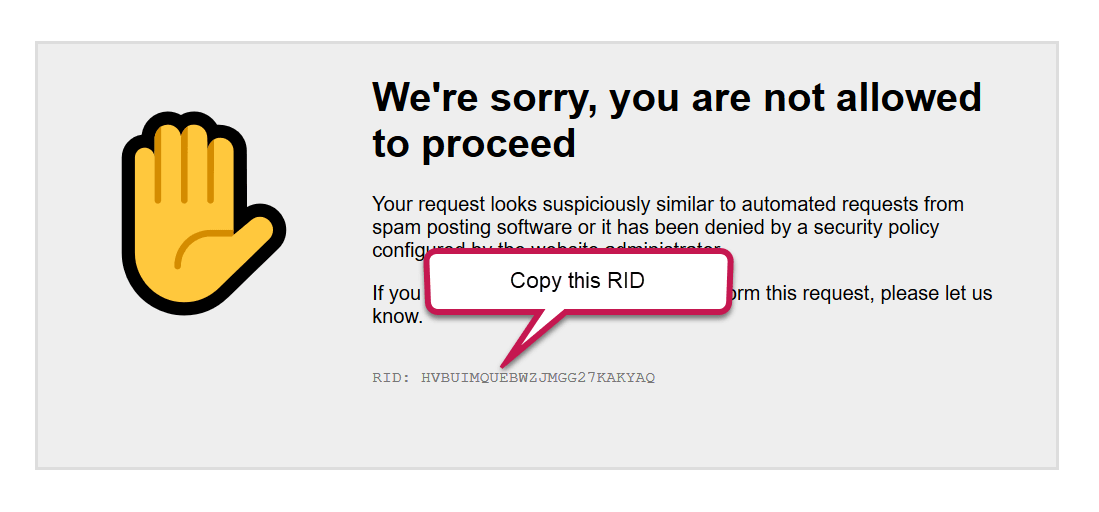
When WP Cerber blocks a suspicious request, a forbidden message is displayed, and the RID is shown as well. When you see such a message, and you know that this legitimate request should not be blocked, you can use the RID to find the reason why WP Cerber blocked it and made adjustments to the plugin’s settings to prevent such requests from being blocked.
Typically this message is shown when a request is blocked either by Cerber’s Anti-spam engine or by the Traffic Inspector firewall.
Use RID to understand what happened
Once you’ve got a forbidden message similar to the shown below, copy the RID from the message and go to the WP Cerber Activity log.
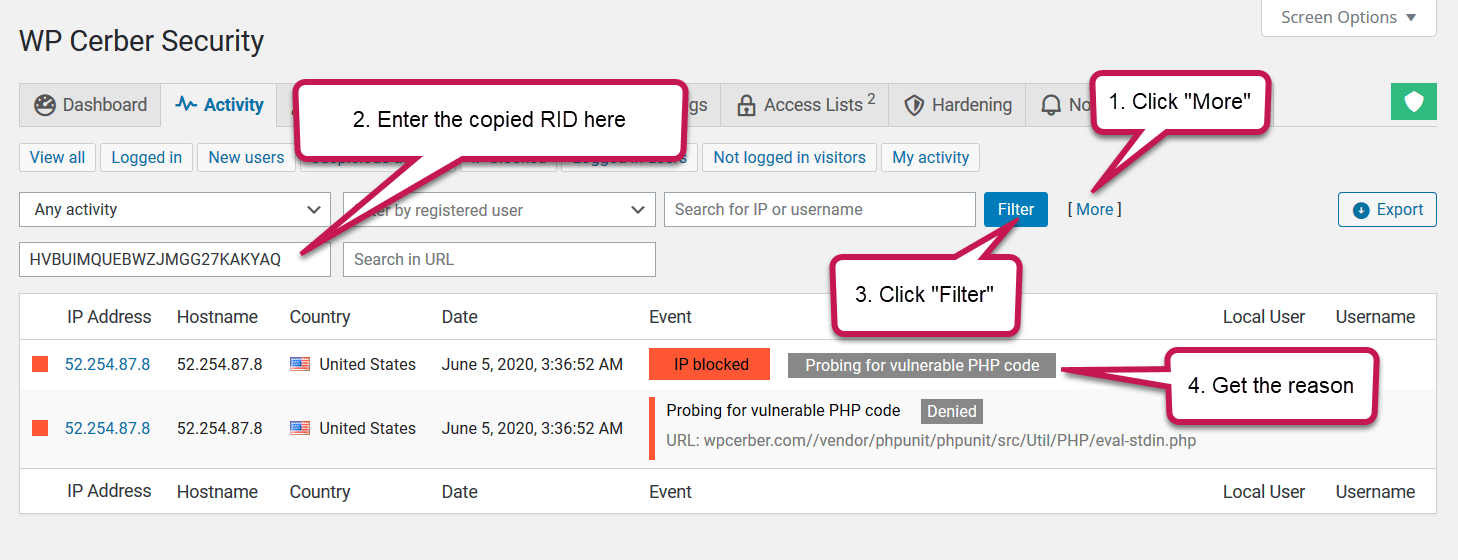
On the Activity log page click the link More. Paste the copied RID into the Request ID field, and click Filter. Now you get the log entry and see why the request was blocked. On the first screenshot, we see the reason “Probing for vulnerable code”, and that means the request was blocked by the Traffic Inspector firewall.
On the next screenshot, we see the reason “Spam form submission denied”, and that means the request was blocked by the Cerber’s anti-spam engine.
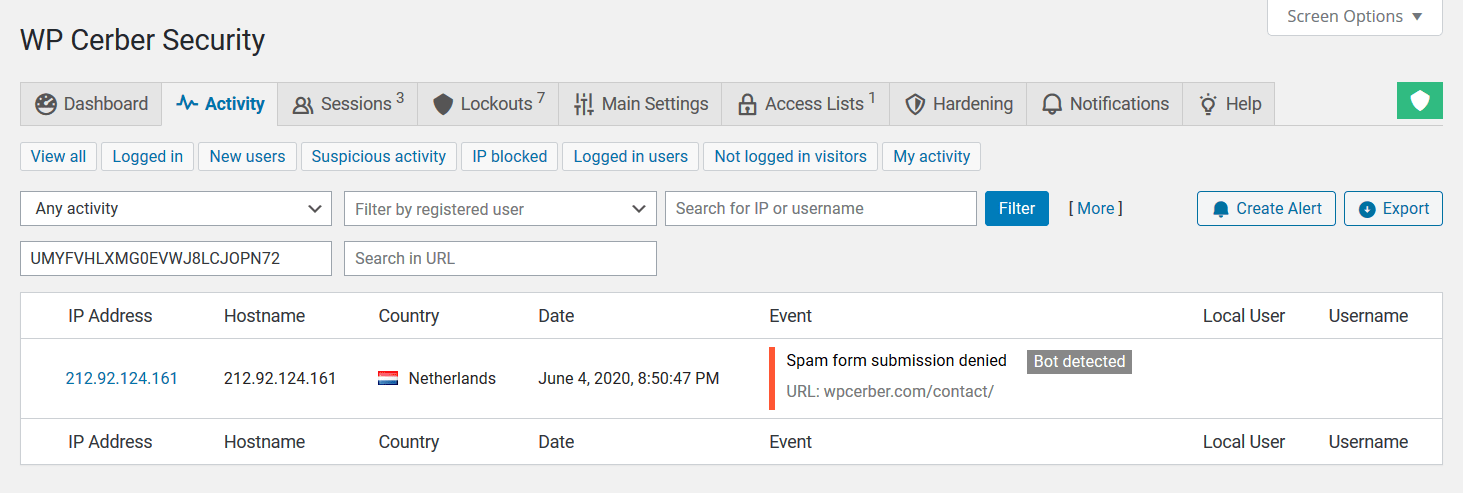
Using Request ID on the Activity log to find out that the request was blocked by the WP Cerber’s anti-spam
Once you’ve got the reason
If you see that Traffic Inspector blocked the legitimate request: How to exclude requests from inspection by Traffic Inspector.
If you identify the Anti-spam engine as the cause: Configuring HTTP request exceptions for the antispam engine.
Read also: What to do if legitimate requests are being blocked.
Get more information on the IP address
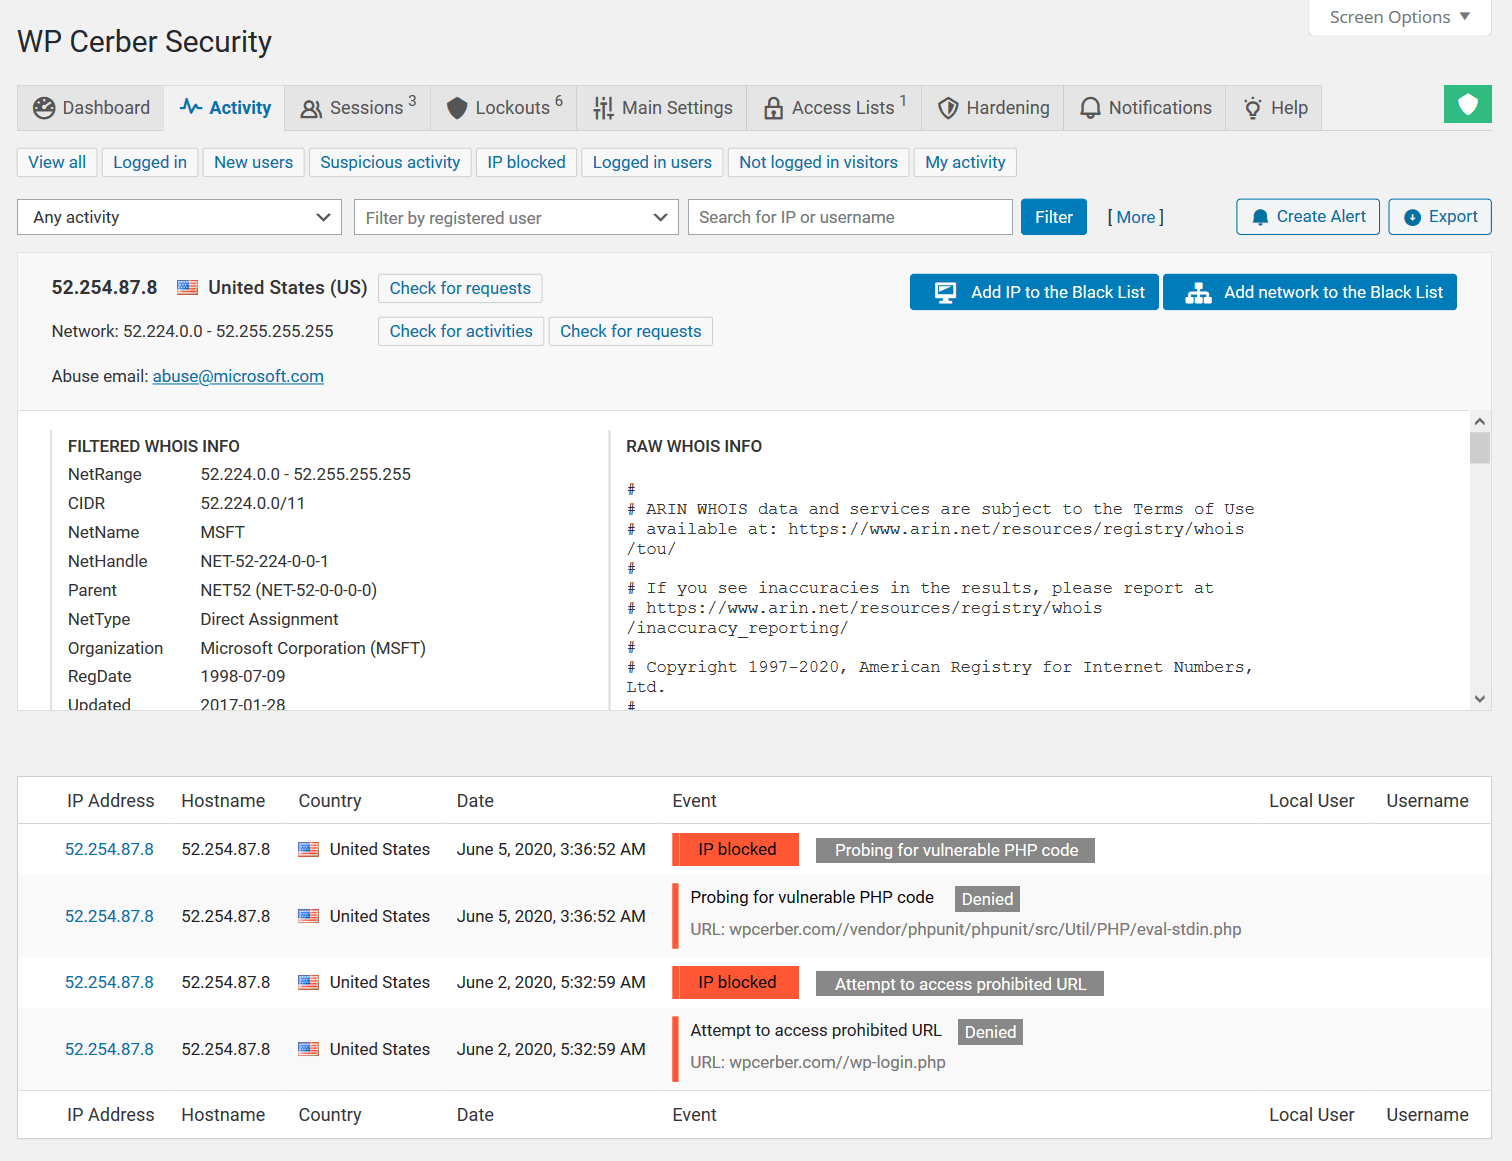
Once you’ve found the request, you can get more information on activities and requests that came from the IP address. Click the IP address in the first column. The activity log will be filtered out by the IP and you’ll see what occurred earlier. On the screenshot, you can see that all requests from the IP were malicious and denied by the Cerber’s firewall. Also, we see that the IP address was blocked twice.
Check requests from the network
If you click “Check for requests”, you’ll see all logged HTTP requests that came from the IP address and from other IP addresses in its network.
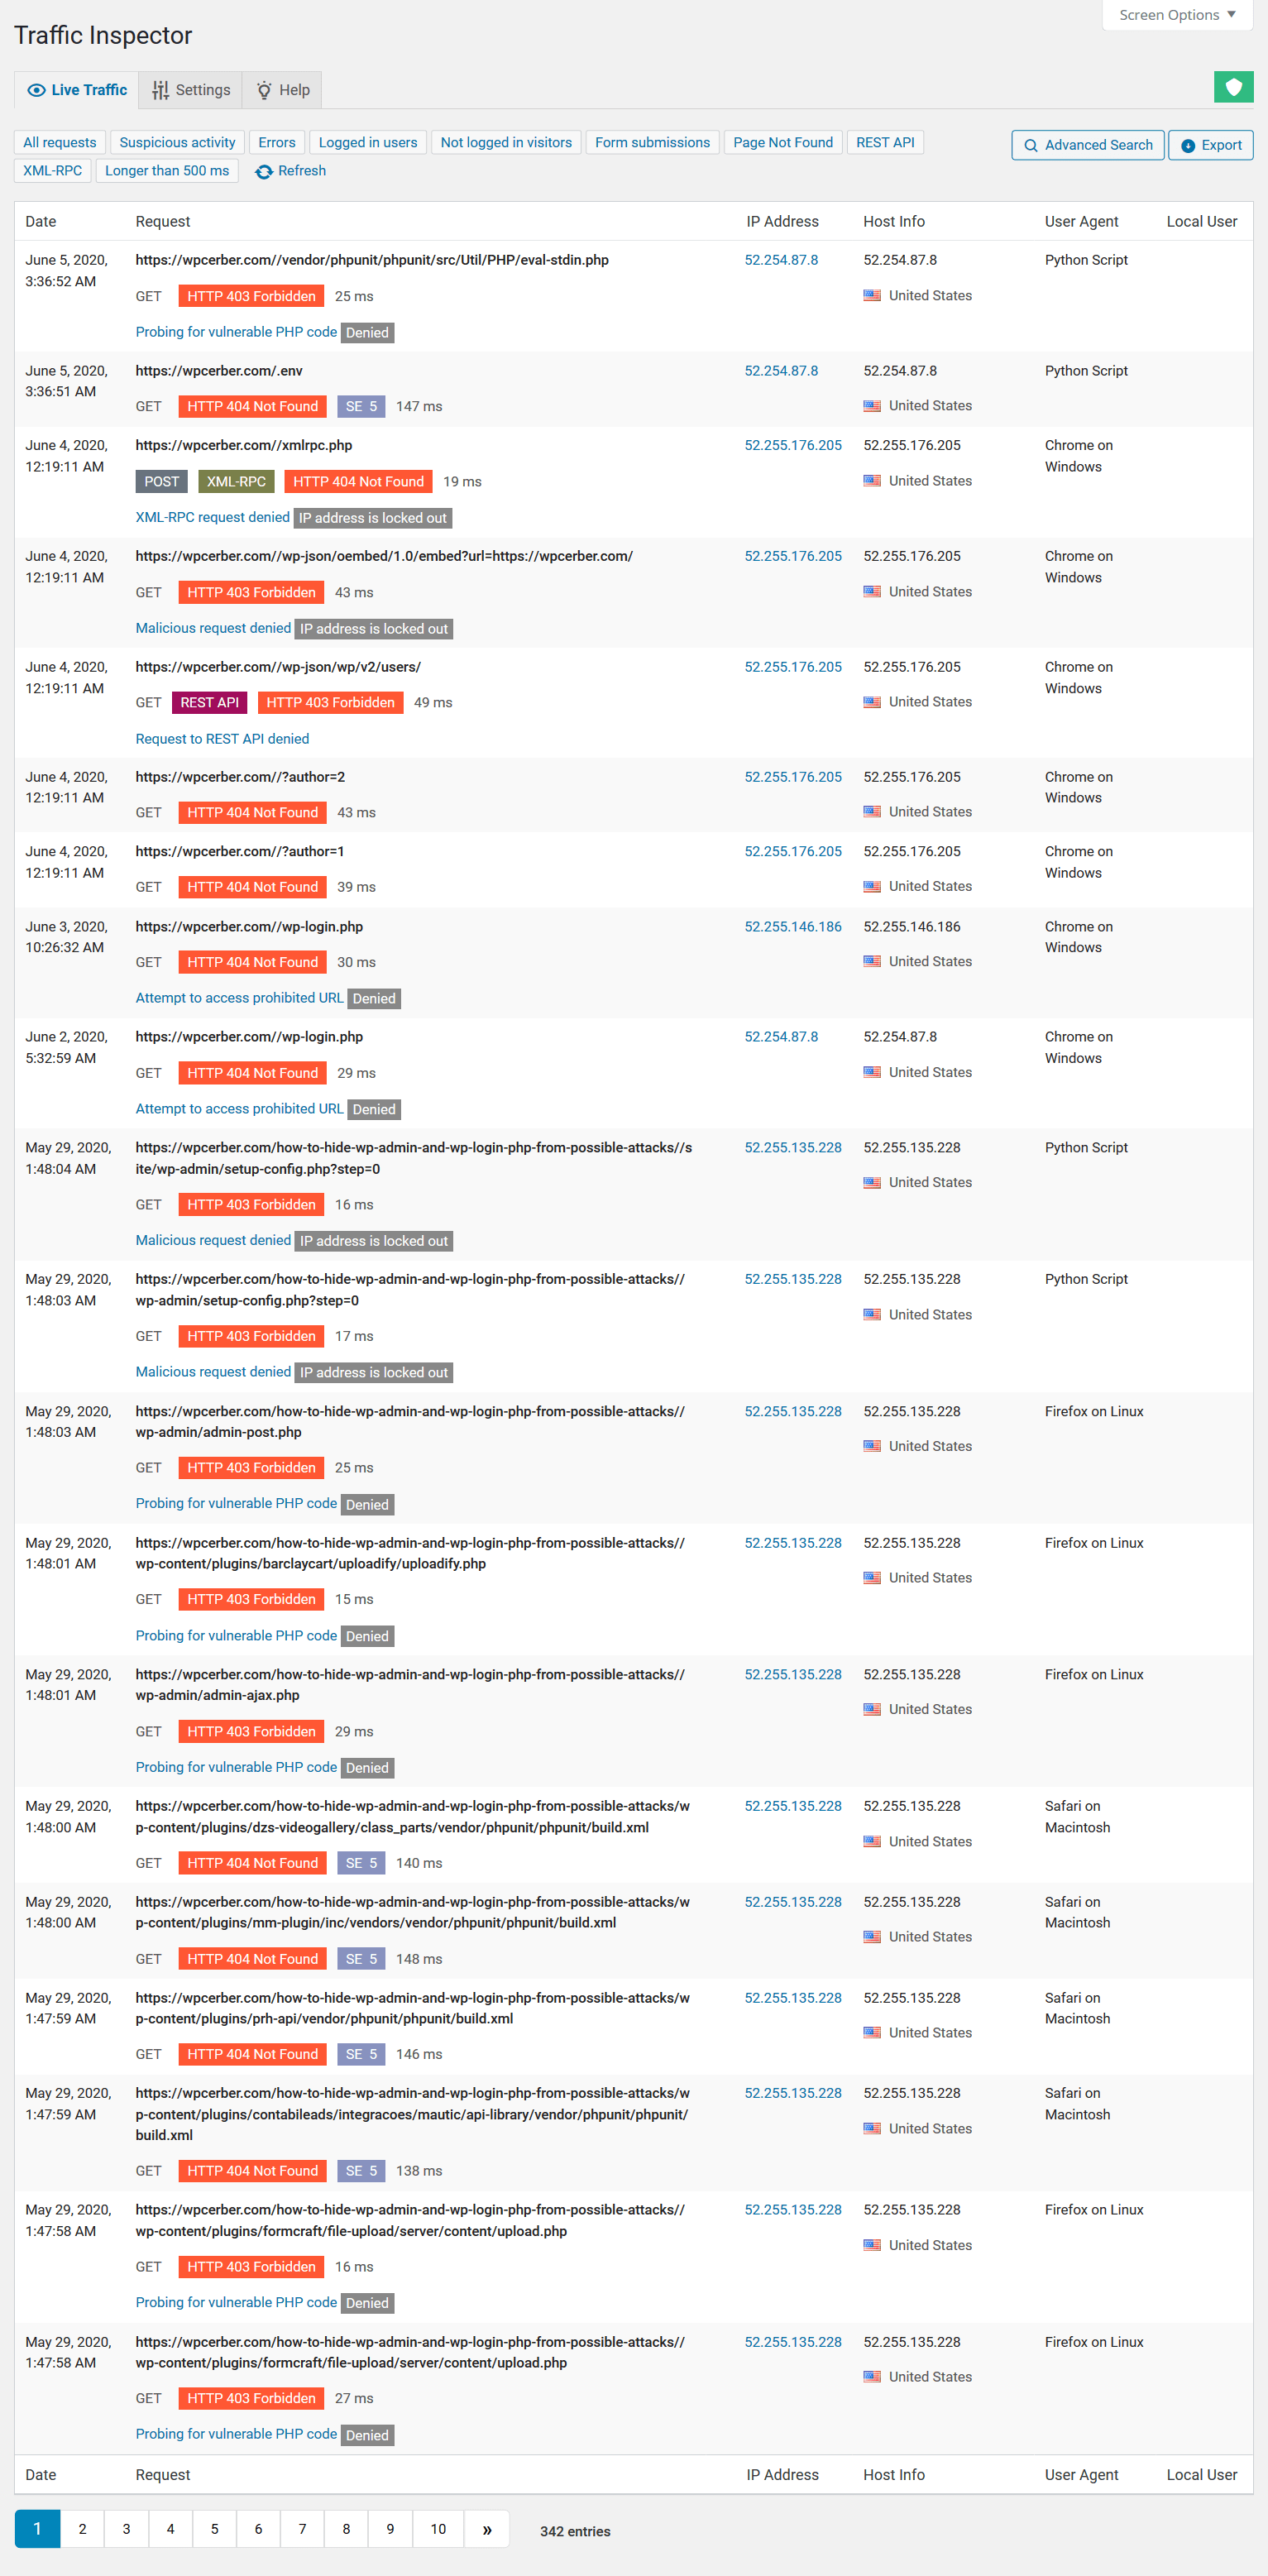
The log of requests from the selected network on the WP Cerber’s traffic log page in the WordPress dashboard
Have any questions?
If you have a question regarding WordPress security or WP Cerber, leave them in the comments section below or get them answered here: G2.COM/WPCerber.
