How to enable automatic updates for WP Cerber
Starting from WP Cerber 9.2, you can enable automatic plugin updates in just a couple clicks. If you are using an older version of WP Cerber, please follow these simple steps to update the plugin to the latest version: https://wpcerber.com/installation/
To enable automatic updates for WP Cerber, you need to enable the following two settings on the “Main Settings” tab:
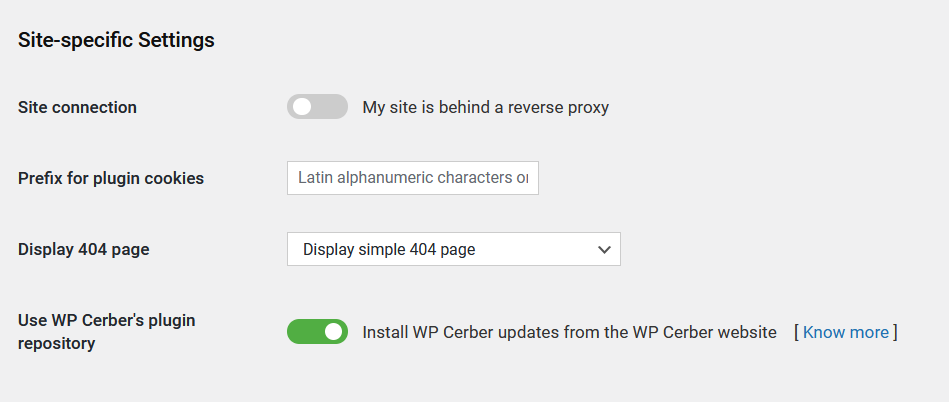
- Enable “Use WP Cerber’s plugin repository”
- Enable “Automatically update WP Cerber”
- Save settings
From now on, whenever a new version of WP Cerber is available in our official repository, or in the wordpress.org plugin repository it will be automatically installed on your website keeping your WordPress secure. For more detailed information, please refer to the information provided below.
Enable using the WP Cerber plugin repository
Click “WP Cerber” in the admin menu of your WordPress dashboard. Go to the “Main Settings” tab. Scroll down to the “Site-Specific Settings” section. Enable “Use WP Cerber’s plugin repository” and save the settings. Now, if a newer version of WP Cerber is available to install, you see a prompt announcing this version on the “Plugins” admin page. You can click the “update now” link to update the plugin.
It’s important to note that if a new version is available to install from the wordpress.org plugin repository, it is installed from it. It means the plugin version from the wordpress.org plugin repository has priority over the version from the WP Cerber repository.
Enable automatic updates for WP Cerber
Once you have enabled using WP Cerber’s plugin repository, you can enable automatic updates for WP Cerber on the “Plugins” admin page. To enable them, click “Enable auto-updates” in the WP Cerber row next to the plugin description.

Have any questions?
If you have a question regarding WordPress security or WP Cerber, ask it in the comments below or find answers on the community forum.
Spotted a bug or glitch?
We’d love to fix it! Share your bug discoveries with us here: Bug Report.


WordPress 5.4.1. A security update fixes seven XSS vulnerabilities
WP Cerber Security 8.6.5
I'm a software engineer and team lead at Cerber Tech. I started coding in 1993 on IBM System/370 and today software engineering at Cerber Tech is how I make my living.